Burnishing Pads

Etched Encaustic Tile Renovation Bournemouth Hotel

Renovating an Etched Encaustic Tiled Terrace at a Bournemouth Hotel

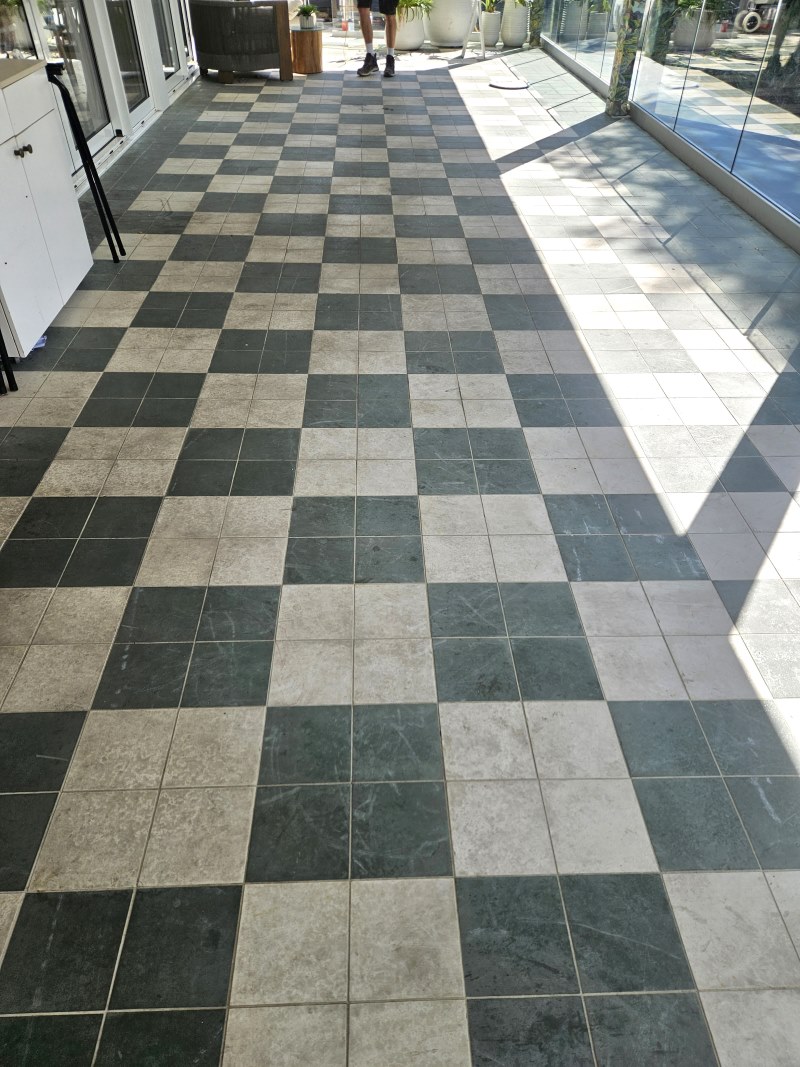
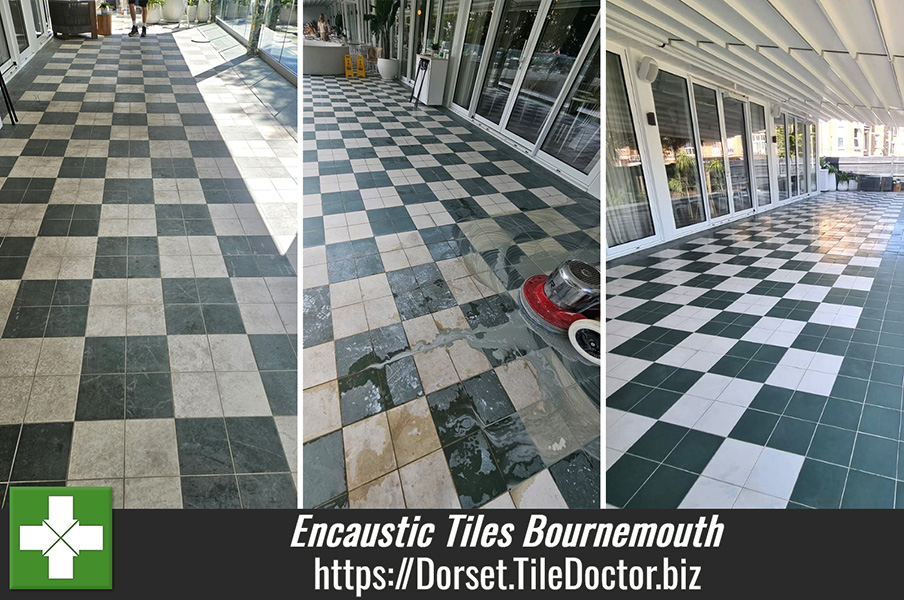
This summer we were asked to visit a luxury hotel and spa in Bournemouth where the cleaning team had used a strong acidic patio cleaner to clean encaustic floor tiles installed on a rear terrace. The acid unfortunately did more than clean the tiles, it also removed any protective sealer and etched the surface leaving the vulnerable to dirt. Realising the tiles were now in a worse state and now proving impossible to keep clean we were asked to call in and recommend a solution.
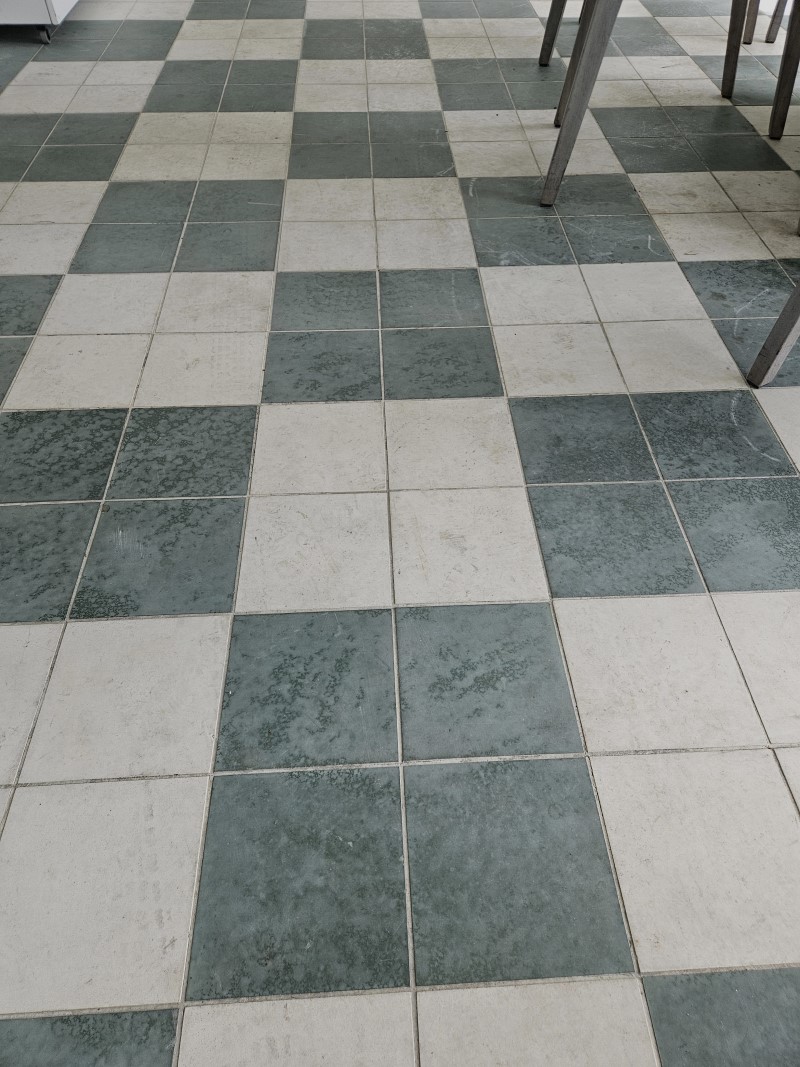
Etched Encaustic Tiles Before Renovation Bournemouth Hotel Etched Encaustic Tiles Before Renovation Bournemouth Hotel

I visited the hotel to survey the floor and could see they were becoming heavily soiled. The rough etched surface was attracting dirt and without a sealer it was getting into the pores of the tile. The tiles would need deep cleaning to flush the dirt out of the tiles; they would then need burnishing with diamond pads to remove the etching and then finally sealing to protect them going forward.

A detailed quote was emailed over to the facilities team who were happy to proceed and a date was scheduled.

Deep Cleaning Encaustic Floor Tiles

Work started with an application of Tile Doctor Pro-Clean which was left to soak in. After ten minutes the floor was burnished with the first burnishing pad which is a coarse 400-grit. The pads contain industrial diamonds and are fitted to a weighted rotary buffer which is run over each tile at least three times to remove the etching. More water is applied as required to keep the surface wet and lubricated.
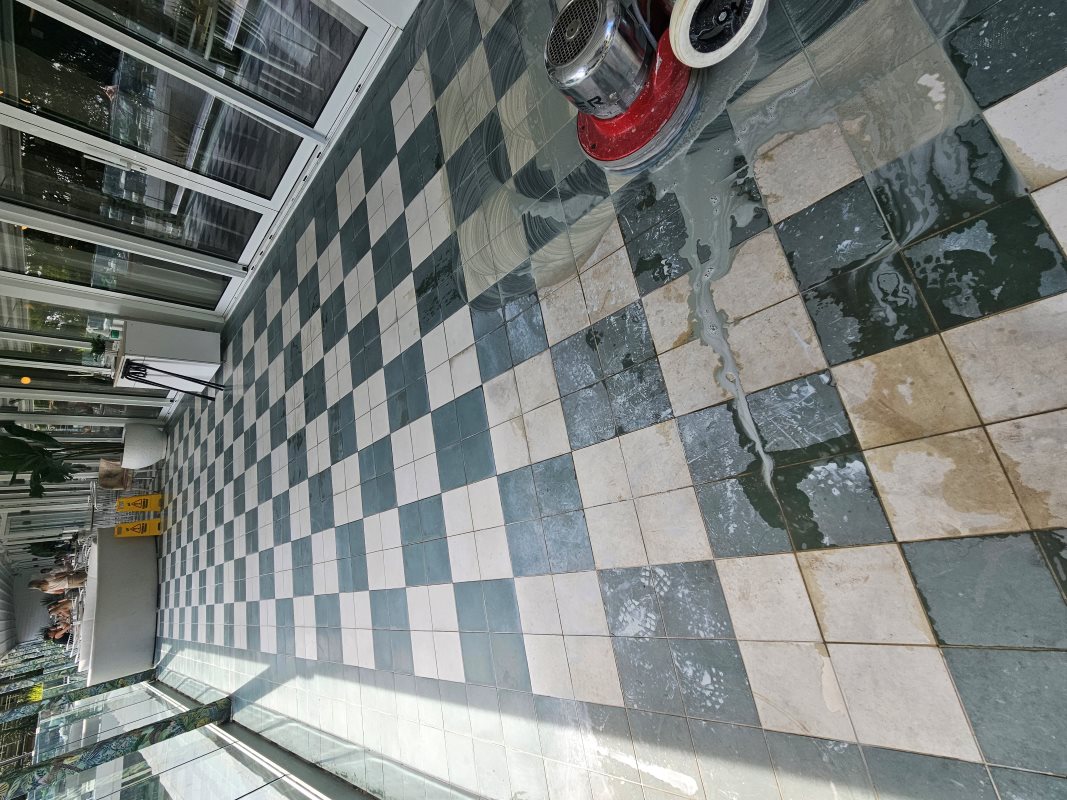
Etched Encaustic Tiles During Renovation Bournemouth Hotel

Rinsing and extracting with the wet vacuum after each pad I moved through the series of pads onto the 800 and 1500-grit pads again using more water as required. We stopped at the 1500-grit pad as the finish matched the shine of the rest of the patio that hadn’t been affected.

The grout was also cleaned with more Pro-Clean and a stiff brush and after a final rinse the floor was left to dry out.

Sealing an Encaustic Tiled Terrace Floor

The following day I returned to seal the tiles first checking the floor had completely dried out. To do this I take several moisture readings using a damp meter. The readings were fine so I was satisfied the tiles were ready to accept a sealer.

To seal the Encaustic tiles three coats of Tile Doctor X-Tra Seal, which rated for external use, were applied; additionally, the X-Tra seal which is oil based was mixed with Colour Grow to make it more workable. This durable combination improves colour and was ideal for high traffic hotel terrace like this. The last step was to give the tiles a final buff with a white pad to remove excess sealer and bring up the polished appearance.
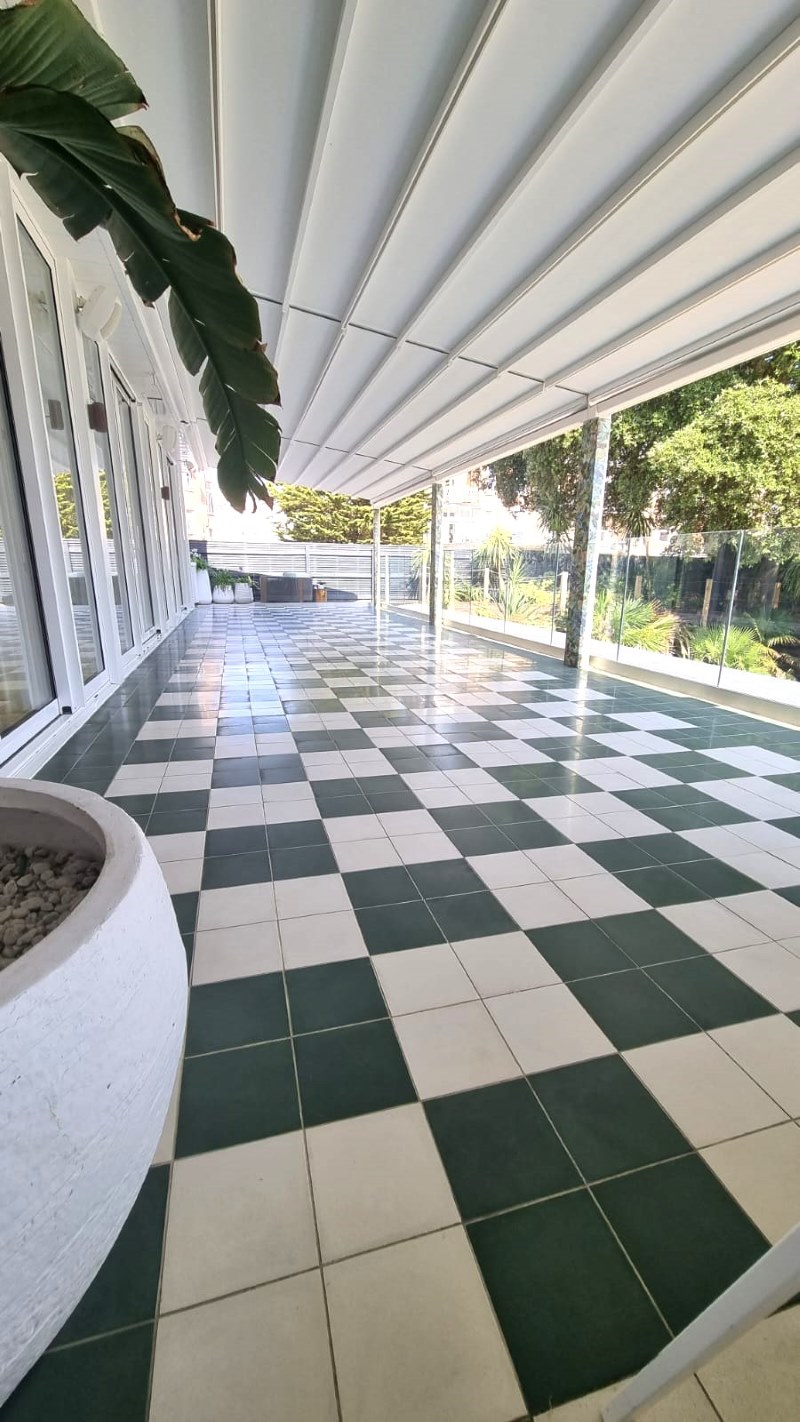
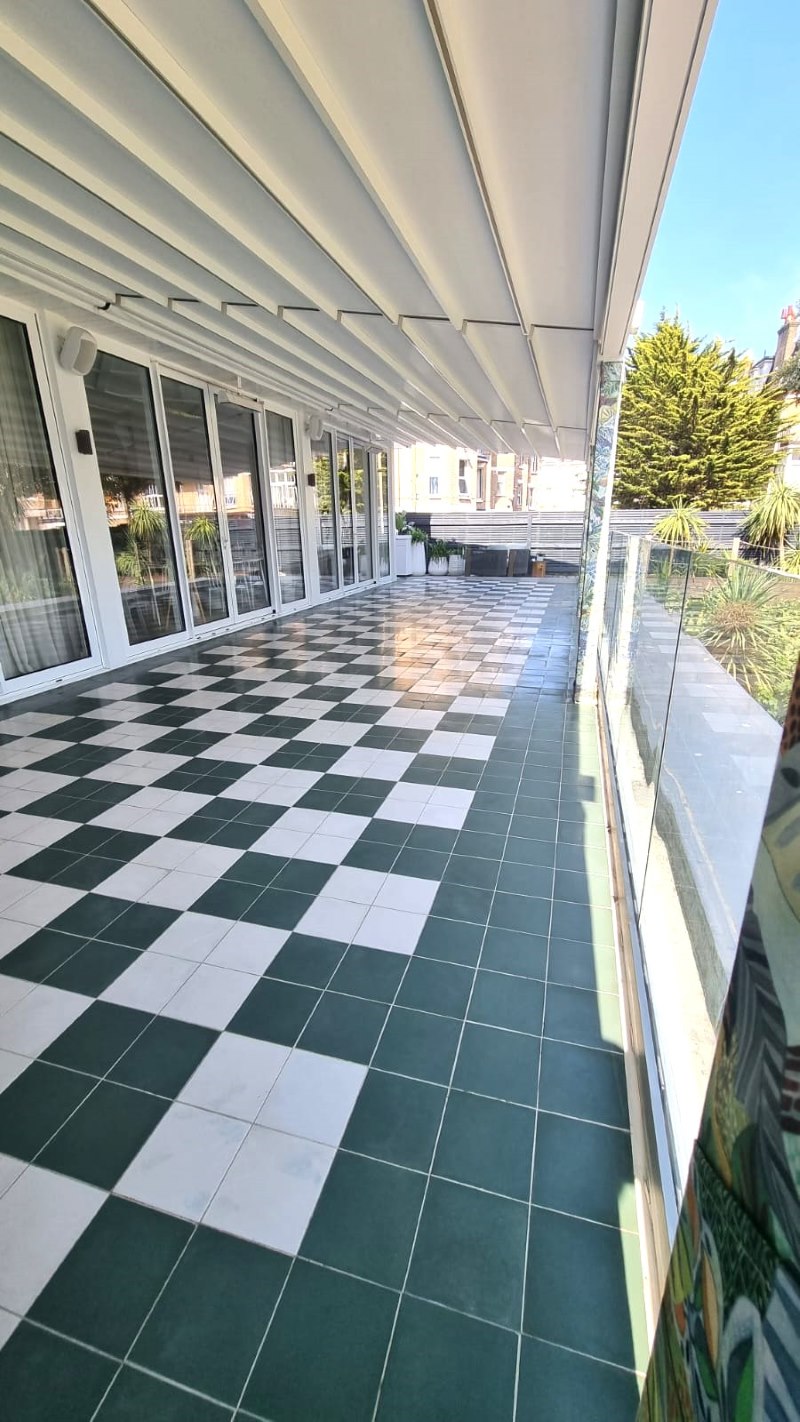
Etched Encaustic Tiles After Renovation Bournemouth Hotel Etched Encaustic Tiles After Renovation Bournemouth Hotel

The result was transformational and the attractive encaustic tiled terrace is now back in full-time use.


Professional Restoration of Encaustic Floor Tiles in Dorset

Renovating an Etched Encaustic Tiled Terrace at a Bournemouth Hotel Read More »
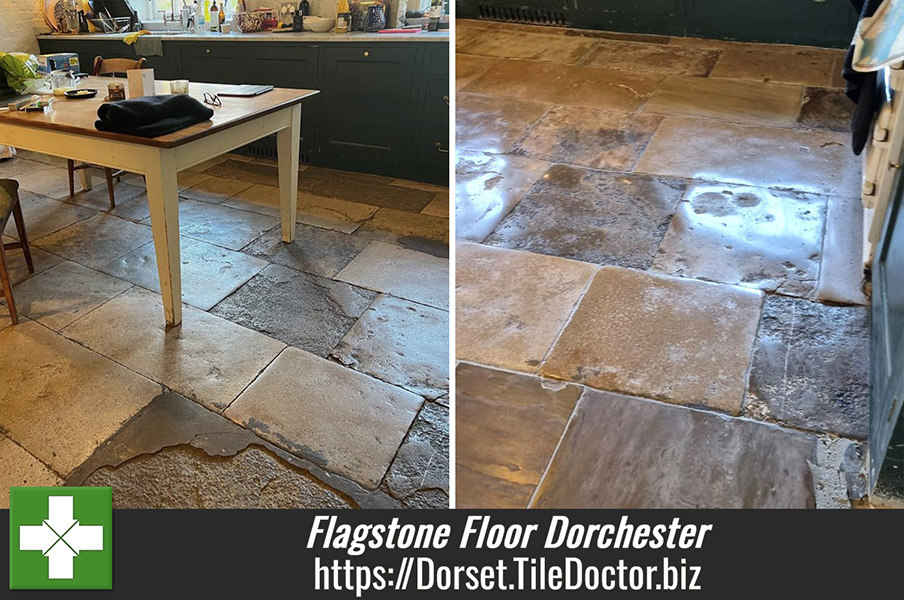
Flagstone Kitchen Floor Resurfacing Dorchester

Resurfacing an Old Flagstone Kitchen Floor in Dorchester

This client lived on a farm on the outskirts of Dorchester and had a rustic kitchen with very old flagstones. The flags had been down a very long time and were uneven and some were in a very bad state due to the top layer of stone flaking away. They had found it very difficult to keep the rough stone clean and this was proving increasingly irritating.

Flagstone Kitchen Floor Before Cleaning Dorchester

I recommended that the best course of action would be to mill the stone to remove the rough areas and resurface the stone, this would also reduce the lippage between the flagstones. Milling is a process championed by Tile Doctor which utilises very coarse diamond pads to remove a thin layer of stone from the surface and then finer grit pads to refine the appearance of the new surface making it smooth and easier to maintain in the process.

Flagstone Kitchen Floor Before Cleaning Dorchester

Keen to go ahead with my recommendation I measured up and put together a quotation that included all the products and labour needed to mill the floor. With the quotation accepted we agreed a date to begin then work.

Cleaning and Milling a Flagstone Tiled Kitchen

The milling started with the application of a very coarse 50-grit diamond Flexi-Pads fitted to a heavy-duty floor buffer with added weight to ensure maximum traction with the stone. Using only water for lubrication these pads do the bulk of the work and remove a fine and often contaminated layer from the surface of the stone to reveal new stone underneath.

This is the slowest part of the job with each flagstone requiring five to ten minutes of milling before moving onto the next. A lot of water was used in this process which mixes with the cut stone to form a slurry which is then vacuumed away. It took a full day to cover all the floors, and I got through three of the 50-grit pads in the process.

The process from here ran significantly quicker. A finer 100-grit flexi pad was applied next, followed by a 200-grit flexi pad, a 200-grit soft diamond pad then 400 and finally 800-grit pads. Less and less slurry was produced as I worked through each of the finer grit pads. Again, using water for lubrication and removing the slurry with a wet vacuum as work progressed.

The floor was then rinsed and allowed to dry thoroughly overnight.

Sealing a Flagstone Tiled Kitchen

The following day I returned to start the sealing process. I tested the floor with the damp meter, satisfied the result was within the correct parameters, I was ready to start. To seal two coats of Tile Doctor Colour-Grow were applied to bring out the colour and make the floor easier to clean going forward. Colour Grow is also a fully breathable sealer which is an important feature when choosing a sealer for an old floor like this one.

Flagstone Kitchen Floor After Renovation Dorchester

Once complete the floor looked so much healthier and my client was thrilled with results. For aftercare cleaning I recommended the use of Tile Doctor Neutral Tile Cleaner to maintain the floor, this is pH neutral and so won’t harm the newly applied sealer.

Flagstone Kitchen Floor After Renovation Dorchester


Professional Restoration of a Flagstone Tiled Kitchen in Dorset

Resurfacing an Old Flagstone Kitchen Floor in Dorchester Read More »

Terrazzo Porch Floor Restoration Bournemouth

Restoring a Cracked Terrazzo Porch Floor in Bournemouth

The pictures below are of a weathered Terrazzo floor laid in the open porch of a house in Bournemouth. Being exposed to the elements the Terrazzo was dull with ingrained dirt and unfortunately a few cracks had developed.

Terrazzo Porch Floor Before Restoration

Unhappy with its appearance the owner felt it was time for a refresh and contacted Tile Doctor to see what could be done. We discussed the project over the phone and shared a few images over email. Restoring the appearance of the Terrazzo wouldn’t be an issue however I was concerned about the cracks so I arranged a time to visit the property so I could understand the extent of the issues in detail.

Terrazzo Porch Floor Before Restoration

Whilst at the property I was able to confirm that the cracks were not that deep and came up with a restoration plan that would completely renovate the patio. I was able to use this to create an accurate quote for the work which was accepted and a date set on the proviso off good weather.

Cleaning a Terrazzo Tiled Porch Floor

Thankfully the weather was good and I was able to move straight onto burnishing the Terrazzo with a set of 17-inch diamond burnishing pads worked in with water. The first pad in the sequence is a coarse 400-grit which grinds off the dirt and is the first step in refining the appearance of the stone and aggregate. The process generates a fair amount of slurry in the process which is then rinsed away with more water and extracted with a wet vacuum.

The fine cracks in the Terrazzo were then filled using a flexible grout in a similar colour to the Terrazzo. Once that had dried the burnishing process was repeated using a medium 800-grit and then fine 1500-grit burnishing pad, rinsing and extracted after each pad. The last pad in the sequence is a super fine 3500-grit pad that is applied dry with only a little water sprayed onto the surface.

Sealing a Terrazzo Porch Floor

First, I checked the floor had dried out with a moisture meter, it was within the acceptable levels, so had the green light to processed and seal the Terrazzo. For this a couple of coats of Tile Doctor Ultra Seal were applied which is an impregnating natural look sealer that provides durable protection to the surface as well as allowing the floor to breath.

Terrazzo Porch Floor After Restoration Bournemouth Terrazzo Porch Floor After Restoration Bournemouth

Once I had finished it looked like a new installation and my client was very pleased with the result. Before leaving I took time to discuss aftercare and the importance of protecting the sealer from strong cleaning products that could damage it. For sealed and polished stone, I recommend using Tile Doctor Stone Soap, it’s a mild yet effective cleaning product that will help maintain the patina.


Professional Restoration of a Terrazzo Tiled Porch in Dorset

Restoring a Cracked Terrazzo Porch Floor in Bournemouth Read More »

╳
Scroll to Top